Boden Boat Plans Australia
Finisterra was hauled out of the water the day before yesterday to get fresh bottom paint and have some other minor work done. This is the first time Ive had a chance to inspect the bottom carefully and I was pleased to find it in generally good shape. The bottom paint is still in reasonably good condition except for a few small spots on the keel where the paint has been rubbed off. The painters will sand and prime those areas and shell receive two coats of Pettit Trinidad before she goes back in the water next week.
A couple of observations regarding the design of the boat that are not apparent when shes in the water:
The keel is made of cast iron and weighs about 5,569 pounds. My rough calculations indicate that about 40% of its weight is in the bulb at the bottom of the keel. The bulb is about 16" wide at its thickest and fairs into a very thin fin section. I took some basic dimensions and discovered that the fin is about 3" thick at the thickest point with a chord length of 64", for a thickness ratio of .047 or 4.7%. The top 8 or 10 inches of the fin fair out to a beefy and wide hull/keel joint. So, if we disregard the bulb and the thickened area at the hull/keel joint, the actual lift generating part of the keel is about 36" high by 64" long, with a thickness ratio of 4.7% and an aspect ratio of .56. I wont go into a technical discussion of keel design here but I would love to hear the designer explain his reasoning behind these numbers. It would have been a simple matter to design a much more efficient keel using the same amount of material and draft for exactly the same amount of money, so I wonder what the designer was thinking when he or she designed it.
So what conditions would this keel work best under? Well, itll never generate much lift on the upwind legs and it sports too much wetted surface and parasitic drag to be much good in light air. It will probably work best broad reaching and running in medium conditions. Our experience sailing the boat certainly bears that out. With all that said, if any of you B423 owners out there want to improve your boats performance, swapping out the keel would be a quick and effective way to go.
How about the rudder? There have been times when weve pressed the boat pretty hard on a reach and the spade rudder has proven to be up to the task of steering her in a straight line. Of course the boat can be pushed hard enough to round up in a breeze but it gives plenty of warning and it rounds up in a predictable manner. There is nothing special about the shape of the rudder. It is a bit over-balanced for my taste, meaning that under power if you let go of the wheel, the rudder will slam hard over to port or starboard quickly. Im not pleased by this, but the excess "balance" of the rudder makes helm loads pretty minimal when under sail. This means that you can sail the boat with little pressure on the wheel and the autopilot never has to work very hard under sail. I suppose this is a good trade-off, but I prefer a perfectly balanced helm. The rudder stock is vertical and rides in a set of bushings. From a purely hydrodynamic point of view, a vertical stock is more efficient than a radically angled one. In most boats the upper rudder bearing or bushing is mounted to the underside of the deck but Beneteau has chosen to build the entire rudder support system into the hull only. On my last boat, a Beneteau 36s7, this structure was made of a fiberglass cone about 36" high glassed to the hull with the upper bearing mounted at the top of it. It was a bit disconcerting to see the top of the cone moving around as the boat sailed in anything other than flat seas. Finisterra has a similar arrangement except that the cone has been replaced by a set of longitudinal and transverse bulkheads which appear to do a better job of resolving all the loads imparted by the rudder. At least I have not been able to see any movement of the assembly while underway. I cant say Im a big fan of this method for securing the rudder stock but from a purely structural point of view it works. The main disadvantage is that this arrangement is heavy and takes up a lot of space.
The hull shape itself is very respectable. Its not a particularly beamy boat and the waterlines forward are finer than I expected, while the stern sections are fairly broad. the U-shaped sections forward are about what youd expect and there is no doubt that the 423 will pound a bit when motoring into a head sea. Once again, I think thats a reasonable trade-off for good performance reaching and running.
I was glad to find minimal play in the rudder when I grabbed hold of it and pushed from side to side. My guesstimate is about 1/8 inch in each direction. Overall, I think the hull and appendages are in good shape for our upcoming voyage. The fresh bottom paint should last a couple of years in the tropics.
While the boat is out of the water I replaced the speed and depth sensors. Awhile back I bought a Tacktick T104 instrument package for the boat but have not been able to complete the installation of the system until the boat was hauled and I could change the sensors. Now well be able to use the Tackticks for speed, depth, wind, VMG, etc. By the way, out of curiosity I measured the thickness of the hull laminate in this area. Using dial calipers which I was just able to fit through the hole, it measured .66".
 |
| Beneteau 423 Deep Keel |
A couple of observations regarding the design of the boat that are not apparent when shes in the water:
The keel is made of cast iron and weighs about 5,569 pounds. My rough calculations indicate that about 40% of its weight is in the bulb at the bottom of the keel. The bulb is about 16" wide at its thickest and fairs into a very thin fin section. I took some basic dimensions and discovered that the fin is about 3" thick at the thickest point with a chord length of 64", for a thickness ratio of .047 or 4.7%. The top 8 or 10 inches of the fin fair out to a beefy and wide hull/keel joint. So, if we disregard the bulb and the thickened area at the hull/keel joint, the actual lift generating part of the keel is about 36" high by 64" long, with a thickness ratio of 4.7% and an aspect ratio of .56. I wont go into a technical discussion of keel design here but I would love to hear the designer explain his reasoning behind these numbers. It would have been a simple matter to design a much more efficient keel using the same amount of material and draft for exactly the same amount of money, so I wonder what the designer was thinking when he or she designed it.
 |
| Cast iron fin keel. |
 |
| Note how thin this keel is. Racing keels have thickness ratios roughly twice the 4.7% of this one. |
So what conditions would this keel work best under? Well, itll never generate much lift on the upwind legs and it sports too much wetted surface and parasitic drag to be much good in light air. It will probably work best broad reaching and running in medium conditions. Our experience sailing the boat certainly bears that out. With all that said, if any of you B423 owners out there want to improve your boats performance, swapping out the keel would be a quick and effective way to go.
 |
How about the rudder? There have been times when weve pressed the boat pretty hard on a reach and the spade rudder has proven to be up to the task of steering her in a straight line. Of course the boat can be pushed hard enough to round up in a breeze but it gives plenty of warning and it rounds up in a predictable manner. There is nothing special about the shape of the rudder. It is a bit over-balanced for my taste, meaning that under power if you let go of the wheel, the rudder will slam hard over to port or starboard quickly. Im not pleased by this, but the excess "balance" of the rudder makes helm loads pretty minimal when under sail. This means that you can sail the boat with little pressure on the wheel and the autopilot never has to work very hard under sail. I suppose this is a good trade-off, but I prefer a perfectly balanced helm. The rudder stock is vertical and rides in a set of bushings. From a purely hydrodynamic point of view, a vertical stock is more efficient than a radically angled one. In most boats the upper rudder bearing or bushing is mounted to the underside of the deck but Beneteau has chosen to build the entire rudder support system into the hull only. On my last boat, a Beneteau 36s7, this structure was made of a fiberglass cone about 36" high glassed to the hull with the upper bearing mounted at the top of it. It was a bit disconcerting to see the top of the cone moving around as the boat sailed in anything other than flat seas. Finisterra has a similar arrangement except that the cone has been replaced by a set of longitudinal and transverse bulkheads which appear to do a better job of resolving all the loads imparted by the rudder. At least I have not been able to see any movement of the assembly while underway. I cant say Im a big fan of this method for securing the rudder stock but from a purely structural point of view it works. The main disadvantage is that this arrangement is heavy and takes up a lot of space.
 |
| Slipstream Stainless Steel Propeller |
 |
| Three blade folding prop is a vast improvement over the standard fixed prop. Notice the small collar type zinc. In our harbor these things need replacement about every six weeks. |
The hull shape itself is very respectable. Its not a particularly beamy boat and the waterlines forward are finer than I expected, while the stern sections are fairly broad. the U-shaped sections forward are about what youd expect and there is no doubt that the 423 will pound a bit when motoring into a head sea. Once again, I think thats a reasonable trade-off for good performance reaching and running.
I was glad to find minimal play in the rudder when I grabbed hold of it and pushed from side to side. My guesstimate is about 1/8 inch in each direction. Overall, I think the hull and appendages are in good shape for our upcoming voyage. The fresh bottom paint should last a couple of years in the tropics.
 |
| Mounting the instruments in the cockpit required moving the rope hangers outboard. |
 |
| I mounted instrument brackets in the companionway too. I plan to build a removable seat that will fit in the companionway recess. Its a perfect place to be on cold or rainy watches. |
While the boat is out of the water I replaced the speed and depth sensors. Awhile back I bought a Tacktick T104 instrument package for the boat but have not been able to complete the installation of the system until the boat was hauled and I could change the sensors. Now well be able to use the Tackticks for speed, depth, wind, VMG, etc. By the way, out of curiosity I measured the thickness of the hull laminate in this area. Using dial calipers which I was just able to fit through the hole, it measured .66".

Do you find information about Boden Boat Plans Australia are you looking for? If not, below may help you find more information about the Boden Boat Plans Australia. Thank you for visiting, have a great day.


 The centerboard trunk components are also all glued up, but in two pieces. They will not be glued together until the daggerboard is complete, and then I can appropriately take the down the spacers inside (made from daggerboard jetsam, hence same width pre-finishing) to match the daggerboard, plus 2mm for a cozy fit. The daggerboard is being worked on on the side... I think I have a tempestuous relationship with the board and Im taking it slowly.


 Each chamber is 3/4 of an inch. There will be a plastic grated landing zone below the chambers. The box will be painted a dark brown, and affixed on his house. They like it hot, and hot it will get. Bring on the bats!


 My bow knee came out well except for two things 1. I forgot that it was to be placed OVER the stem. My stem comes up to the edges of the ply, no room to slip it over. This means I will have to either slip it behind the stem or on top of it. I will ask Storer for recommendations. My bow was also considerably wider than the number provided by Storer for the knee. I would highly recommend tracing real world bow to your piece of lumber prior to cutting. Remember to keep the gunwales fastened. My stern knees, by comparison, came out great (I traced the real deal and did not go by the numbers provided by Storer). The great thing about my stern knees is that they are interchangeable, as in, both corners are the same! Yes! Precision building yes! Notice my mail. This is where I throw my bills. Then when I glue on the aft seat, they will be sealed in forever, and all my financial problems will disappear!
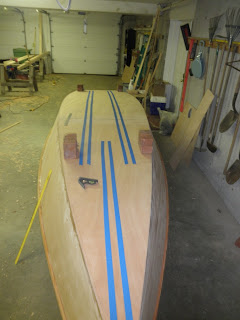
 Because my workshop is a walk from my assembly point in the garage, my hull is becoming my new holding bin/workshop.

