Boat Plans Aluminium Australia
Ive been working away in the shop, fitting the seat tops and filleting them, turning the offcuts into doublers under the edges and sanding out the odd dribbles of epoxy, read on.
Blog 4 September
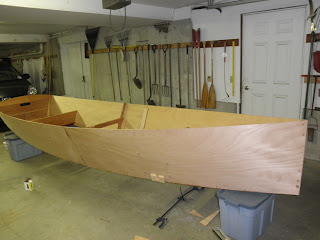
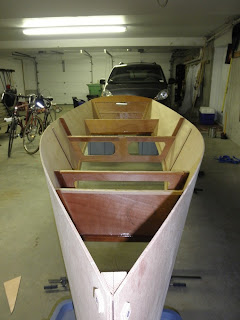
Its getting close, today I fitted the forward seat top. Tis is in two pieces joined down the middle and glued in to form to form not only the seat but the top of the forward bouyancy tank, as well as bracing the mast box.
Filleting, the white stuff is a low density filler from Epiglass with a little cotton mill fibre ( glue mix) mixed in, thats for strength. The brown is Microballoons but underneath that is a smaller fillet of straight glue applied about 6 hours before.
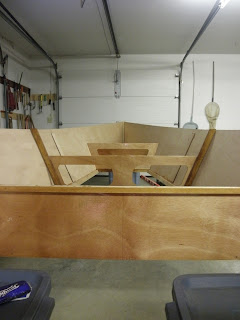
So that’s done, yesterday I fitted the doublers under the edges of the center thwart and the after seat ( which should be referred to as “Stern sheets” but I’m not that “correct” in my terminology). These doublers make a big difference to the feel of the boat, stiffening the overhanging edges of the seats considerably as well as giving them a much more “solid” appearance.
These adoublers re made from the scrap left over from cutting the big parts, there wont be much more than kindling left when I’m done with this project, successively smaller parts get cut as the project goes on, so the scraps get smaller each time around.
Stern sheets, the doublers sitting on the seat above where they will be fitted underneath the overhanging plywood seat edge.
Center thwart. This is a great way to use the offcuts from the planking, makes a much nicer job of the edges of the seat. Next job to do is to glue them in, then round them off.
Forward seat tops to come next.
So tomorrow its at them with the angle grinder and sander to finish off the endges, round them over and fair them. Then some filleting, more sanding, and then its time for paint.
I must say that the Fein Multimaster is an amazing tool for sanding fillets, the point of that triangular sanding head with 60 grit paper on it does a very good job, effortlessly and quickly. I love this tool and would almost own it just for that.
Paint, the outside looks good, two coats of primer, and two coats of satin finish paint looks good, so tomorrow I’ll be splitting the white between two containers and pouring a little of the dark green into one to get the pale green for the interior and then start swinging that paintbrush again.
Tonight, my friend and next door neighbour Emily Scott sings. She has won a scholarship to the UCLA School of Music where she will study in the Masters classical voice program, this is seriously top level stuff! I’ve been to a couple of performances and she’s got me converted to Opera.
Tonights performance is a fundraiser, she’s got to get enough money together to live in Los Angeles for two years to take up her scholarship, and I’m going along.
We’ve had shared dinners, helped each other out some, and enjoyed each others company. I’ll miss her, all the very best Emily.
http://www.creative.auckland.ac.nz/en/about/news/news-2014/2014/07/scholarship-helps-talented-singer-find-her-voice.html
Here’s her facebook page, well worth a look.
https://www.facebook.com/profile.php?id=675895038&fref=ts
Time I got myself tidy, don’t need the black suit and tie but epoxy and paint covered overalls wont quite cut it.
( I went, full house, I listened, I enjoyed the concert immensely)

Do you find information about
Boat Plans Aluminium Australia are you looking for? If not, below may help you find more information about the Boat Plans Aluminium Australia. Thank you for visiting, have a great day.


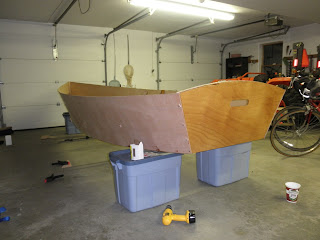
 Storer (el designero) promised that screwing the gunwale would pull it in. I had doubts and didnt want to deal with it, but I tried. Working from the stern forward, I placed one screw in the stern, two amidships, and two right in the bow area where the twist was most apparent. I used the 1 1/4 screws with the ply pads from the bottom screwing event.
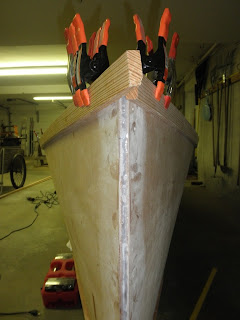

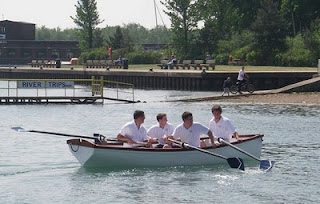
 And were off to the races! Looking good. Looking good.
 The basic hull shape has quite fine ends and reminded me of a Van de Stadt designed Warshipp , were it not for the reverse sheer line. Not sure about the raised full width coach roof, but it would give good interior space in what is a small volume yacht.
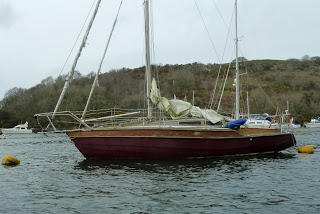 With roller reefing on both jib and stay sail Symphony looks like she has done some serious offshore sailing. It would be nice to know more about her.


 Golif was designed by Jouet with one eye on the American market, where the management believed they could sell a lot of boats. They had probably been helped considerably in their objective by the earlier successful transatlantic voyages of Jean Lacombe, in a plywood Jouet Cap-Horn. Apparently the companys market research suggested that the Americans favoured rather more interior comfort than the European market was used to, and that stiffness under sail and transportability by road would be important qualities for US buyers. Some of the Golifs characteristic features, such as its panoramic cabin window, shoal draft, relatively light displacement and high ballast ratio, stem directly from these market-related requirements.
 Even today, Golifs looks seem rather quirky, though the underwater hull shape and the rig appear conventional. At the time, however, Golifs rig was considered rather tall and narrow, and the aluminium mast was in those days quite an innovation on a small cruising yacht. The odd pinched shape of the coach roof seems to have been intended to maximise the width of the side decks, but without sacrificing headroom in the places below where you might want to stand. Thus, with perfect French logic, there is low headroom over bunks and seats, where you sit or lie down, but there is plenty of headroom over the central passage and galley area, where you stand or walk. As the Jouët company said, this deck was designed from the inside!
 Some versions of the Golif were delivered with an optional deeper keel for racing performance. These boats were excellent performers in offshore races and won many prizes, but it was a perfectly standard Golif that achieved the greatest fame for the class. In 1964, Jean Lacombe who had been Frances sole entrant in the 1960 Observer Singlehanded Transatlantic Race (OSTAR), returned to repeat the feat in a Golif, once again the smallest boat in the competition. This was the year of Eric Tabarlys first triumph, so Lacombes achievement was rather overshadowed by the acclaim and fanfares garnered by the winner. Nevertheless, Lacombes Golif took joint pride of place, alongside Tabarlys Pen Duick II at the centre of the 1965 Paris Boat show.


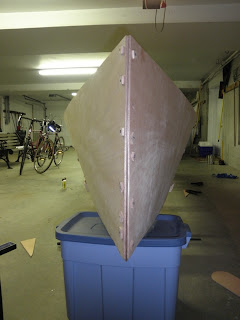
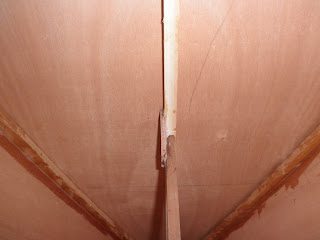
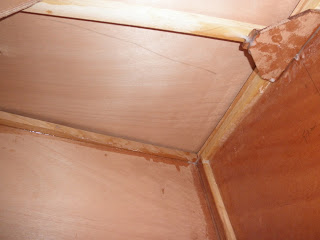
 Flash made BH1 and 2 darker than they are.

 The last one here is through the transom hole.